
Table of Contents
- Practice 1: Hazard Identification and Risk Assessment Before Every Run
- Practice 2: Meet Dangerous Goods Transport Requirements for Classification and Licensing
- Practice 3: Get Dangerous Goods Packaging and Labelling Right
- Practice 4: Keep Dangerous Goods Transport Documentation Complete and Current
- Practice 5: Train Drivers and Staff for Safe Handling
- Practice 6: Build a Dangerous Goods Emergency Response Plan
- Practice 7: Run Pre-Trip Checks and Plan Routes for Remote Travel
- Conclusion: Turning These Practices Into Daily Operations
- Frequently Asked Questions
Last Updated: October 4, 2026
Practice 1: Hazard Identification and Risk Assessment Before Every Run
Managing hazardous goods transport in Western Australia starts with knowing exactly what you are moving before it leaves the yard. Hazard identification finds every way a load could hurt someone, damage property or harm the environment; risk assessment ranks those dangers so you act on the worst first.
The Australian Code for the Transport of Dangerous Goods by Road and Rail sets out the national framework for classifying and handling these loads. In practice, that means a documented assessment before dispatch, not a mental note.
A simple pre-run assessment covers:
- What the substance is and which class it falls into
- How much is travelling and in what packaging
- The route, including remote stretches and fuel stops
Review it whenever the load, route or driver changes.
Practice 2: Meet Dangerous Goods Transport Requirements for Classification and Licensing
Dangerous goods transport requirements in Western Australia begin with correct classification: every substance must be assigned a class, division and packing group before transport.
Classification determines:
- Which packaging and labelling rules apply
- Whether the driver needs a dangerous goods licence and endorsement
- What documentation must travel with the load
For road and rail movements, the National Transport Commission’s dangerous goods guidance explains how classes are assigned and what each one demands.
Licensing matters as much as classification. Drivers carrying most dangerous goods need a current licence with the right endorsement, and vehicles must meet the performance requirements for the class carried.
Practice 3: Get Dangerous Goods Packaging and Labelling Right
Packaging is the first line of defence, strong enough to survive vibration, stacking and temperature swings. For most classes only tested, approved packaging is allowed, specific to the substance and quantity.
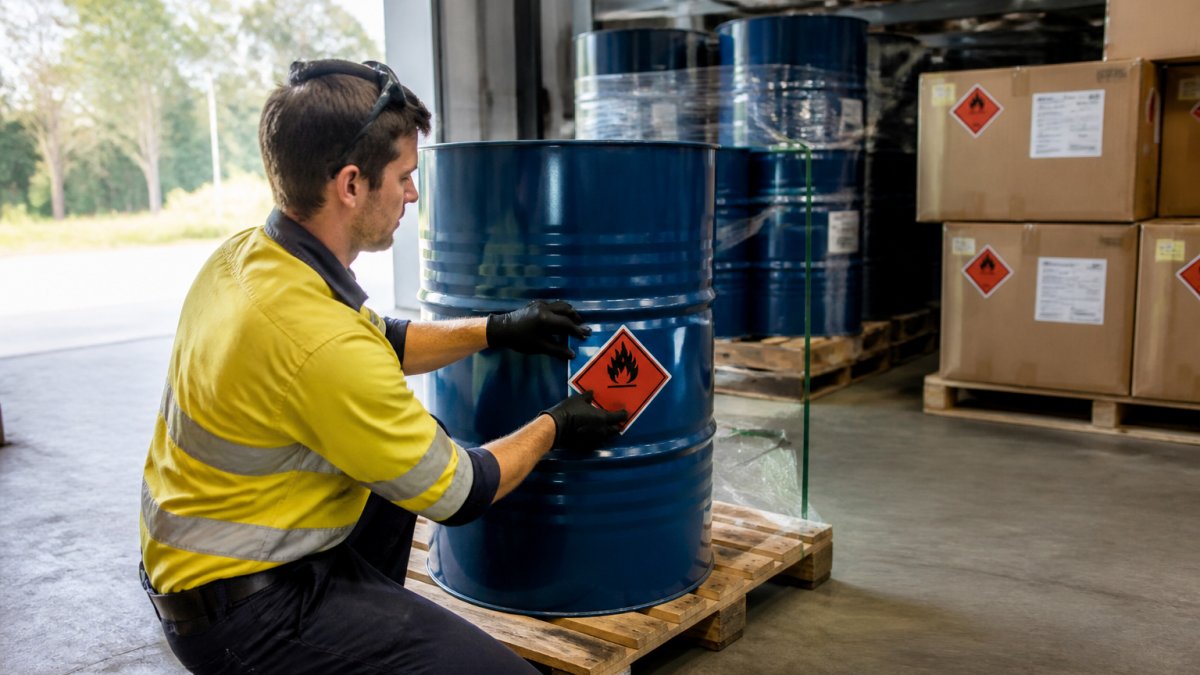
Check packaging before every load:
- No dents, corrosion or moisture damage
- Closures tight and seals intact
- Inner packaging secured so it cannot shift
Package Marking, Labelling and Vehicle Placarding
Marking, labelling and placarding are three separate jobs, and all three must be right: marking identifies the package and contents, labels show the hazard class with the correct diamond, and placarding tells the world what the vehicle carries.
Placards must match the load, be visible from the required angles, and be changed when the load changes. A vehicle still showing a class 3 placard after offloading fuel is a compliance failure waiting to be spotted.
Practice 4: Keep Dangerous Goods Transport Documentation Complete and Current
Documentation proves the load is compliant, if an inspector stops a vehicle and the paperwork does not match the goods, the run stops there. It typically includes the transport document, emergency information, and the driver’s licence and endorsements.
The transport document must state:
- The proper shipping name and UN number
- The class, division and packing group
- The quantity and number of packages
Safety Data Sheets and the Transport Document
A Safety Data Sheet, or SDS, is the detailed safety document for a substance, covering hazards, first aid, handling and spill response. The transport document is the shorter, load-specific record that travels with the goods.
Keep the current SDS on file for every hazardous substance you handle, matching the version actually shipped. An outdated sheet can give a driver the wrong first-aid advice in an emergency.
Practice 5: Train Drivers and Staff for Safe Handling
Training is not a one-off induction. Drivers, loaders and warehouse staff all need training matching the goods they handle, a driver moving only class 3 liquids does not need the same depth as one carrying class 6 toxic substances.
Cover these areas:
- The hazards of each class they handle
- Correct loading, segregation and securement
- Reading labels, placards and transport documents
Document training with dates and refresher schedules, and check driver competency in the field, a short observed run tells you more than a signed attendance sheet.
Subcontractors need the same standard: confirm their drivers hold the right endorsements and their vehicles meet performance requirements before the load moves.
Practice 6: Build a Dangerous Goods Emergency Response Plan
A dangerous goods emergency response plan is a written set of steps for spills, leaks, fires and road incidents, specific to the goods you carry and the routes you run. In Western Australia, where a Perth to Port Hedland run can exceed 1,600 kilometres and leave phone coverage for hours, the plan has to work without backup.
Every plan should answer:
- Who is in charge at the scene
- How to isolate the area and protect people
- What equipment is on board and how to use it
Keep the plan with the vehicle, not back at the office. Drivers should be able to reach it in seconds.
Spills, Leaks and Remote Road Incidents
Remote stretches change the maths on emergency response: help can be hours away, so the plan must assume the driver is alone for a while.
For spills, the priority order is always the same: protect people first, then contain the spill, then notify. Never let a driver attempt a clean-up that puts them in contact with the substance without the right protective gear.
Incident Response Actions for Spills, Leaks and Road Emergencies
A practical plan turns emergency planning into a sequence a driver can follow under pressure.
- Stop and secure the scene. Park safely, switch off the engine, apply the park brake, and set out warning triangles. Put on PPE before approaching the load.
- Identify the substance. Read the transport document and the package label. Confirm the UN number, class and packing group. Do not guess from smell or appearance.
- Protect people first. Move anyone not involved upwind and uphill of the spill. If the substance is toxic or flammable, keep ignition sources away and do not re-enter the hazard area without breathing apparatus.
- Contain if safe to do so. Use the spill kit to dam, absorb or divert the spill away from drains and watercourses. Never attempt containment if it puts you in contact with the substance.
- Notify in the right order. Call 000 for fire, injury or a major spill. Then notify your control room or base, the consignor, and the relevant state authority. For a reportable incident, the operator must notify the regulator, the Department of Mines, Industry Regulation and Safety is the WA regulator for dangerous goods.
- Preserve evidence and records. Photograph the scene, note the time, location and actions taken, and keep the transport document and SDS with the vehicle. These records support both the incident investigation and any insurance claim.
What to Carry for Remote Runs
A spill kit sized for the largest container on board is the minimum. For remote routes, add:
- Absorbent material, booms and a containment drain cover
- Chemical-resistant gloves, goggles and a face shield
- A high-visibility vest and warning triangles
Escalation and Notification
Drivers need a clear escalation path, not a phone tree worked out at the roadside. Name the roles, not just the numbers: who calls 000, the control room, the consignor, and who manages media. On a remote route the first responder may be a station hand or passing truck driver, the plan should say what the driver tells them and what they must not do.
Practice 7: Run Pre-Trip Checks and Plan Routes for Remote Travel
Pre-trip checks catch problems while the vehicle is still in the yard. A short, consistent routine beats a long checklist nobody completes: walk around the vehicle, check the load, then check the paperwork.
Packaging, placarding, load security, paperwork and vehicle readiness all meet at the pre-trip check. The workflow below connects them so nothing falls through the gap.
Pre-Trip Vehicle, Load and Documentation Checks
Work through the check in the same order every time. The sequence matters: vehicle first, then load, then paperwork, because a defect in the vehicle stops the run before the load is touched.
Vehicle readiness
- Tyres: tread depth, pressure, and no cuts or bulges
- Brakes: air pressure or hydraulic feel, and no warning lights
- Lights: headlights, indicators, brake lights, and hazard lights
Load and securement
- Load restraint: straps, chains or twist locks tight and rated for the load
- Segregation: incompatible classes separated by the required distance or barrier
- Packaging: no dents, corrosion or moisture damage; closures tight
Documentation
- Transport document: proper shipping name, UN number, class, packing group, quantity, consignor and consignee
- Safety Data Sheet: current version for every substance on board
- Emergency response plan: with the vehicle, not in the office
Journey Planning for Remote and Long-Distance Routes
Western Australia’s freight task is unlike any other state’s: a single run can cross more than 1,600 kilometres of remote highway with fuel stops hundreds of kilometres apart and no phone coverage in between. Journey planning is a safety control, not a formality.
Plan the journey around these factors:
- Fuel and rest stops. Identify every fuel point on the route and note the distance between them. On remote routes, a headwind or a heavy load can cut range significantly.
- Coverage gaps. Mark where phone coverage drops out and where it returns. Share the route and expected arrival time with someone at base, and agree a check-in schedule.
- Road conditions. Unsealed sections, floodways, and road trains change how the vehicle handles and how far ahead you need to plan. Check the Main Roads Western Australia travel map before departure.
The Pre-Trip Workflow in One Table
|
Check |
What to Look For |
How Often |
|---|---|---|
|
Vehicle condition |
Tyres, brakes, lights, couplings |
Every trip |
|
Load securement |
Straps tight, goods segregated |
Every trip |
|
Placarding |
Correct class, visible, secure |
Every load change |
|
Documentation |
Transport doc, SDS, emergency plan |
Every trip |
|
Driver credentials |
Licence and endorsement current |
Before dispatch |
|
Remote route plan |
Fuel, rest stops, coverage gaps |
Every remote run |
|
Emergency access |
Nearest hospital, workshop, recovery point |
Every remote run |
Conclusion: Turning These Practices Into Daily Operations
The gap between a compliant operation and a risky one comes down to consistency, not knowledge. Teams know what good looks like; the challenge is doing it on every run.
At Seatram, we handle the freight forwarding side so your hazardous cargo moves safely, on time and on budget. Our team manages end-to-end supply chain solutions, from wharf-to-wharf and door-to-door, with tailored planning for each client’s requirements.
Frequently Asked Questions
What are the requirements for transporting dangerous goods in Western Australia?
In Western Australia, dangerous goods transport is governed by the Dangerous Goods Safety Act 2004 and the Dangerous Goods Safety (Road and Rail Transport of Non-explosives) Regulations 2007, administered by the Department of Mines, Industry Regulation and Safety. Requirements cover classification, packaging, marking and labelling, vehicle placarding and licensing, driver training, transport documentation, and emergency response planning. Explosives fall under separate regulations. Because obligations are shared across consignors, carriers, drivers and receivers, each party must confirm their own duties before a load moves.
What documents are required to transport dangerous goods?
A transport document must accompany every dangerous goods load. It needs the consignor’s and receiver’s details, the UN number and proper shipping name, the class and subsidiary risk, the packing group, the number and type of packages, and the total quantity. Safety Data Sheets should be accessible for each substance. Drivers also carry licences with the correct dangerous goods endorsement, and vehicles carry placards matching the load. Keep documents current and legible, because inspectors and emergency services rely on them during an incident.
What training do workers need to handle dangerous goods?
Anyone who consigns, packs, loads, drives or receives dangerous goods needs competency-based training covering classification, packing, marking and labelling, documentation, safe handling, and emergency procedures. Drivers require a dangerous goods driver licence with the relevant endorsement, which involves approved training and assessment. Training should be refreshed regularly and recorded, and it should match the specific classes and quantities your operation handles. General induction alone is not enough for regulated dangerous goods work.
How should transporters prepare for a dangerous goods spill or incident?
Prepare a written emergency response plan that covers likely spill, leak and fire scenarios for each class you carry. Equip vehicles with appropriate spill kits, personal protective equipment, fire extinguishers and warning devices. Train drivers to isolate the area, notify emergency services on 000, contact the consignor, and contain the spill only if it is safe. Keep emergency contact numbers and SDS in the cab. After any incident, review what happened and update the plan and training accordingly.